

Dahlias
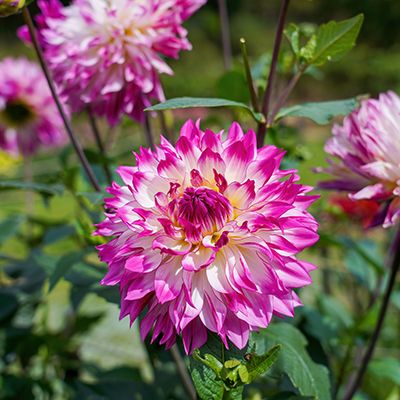
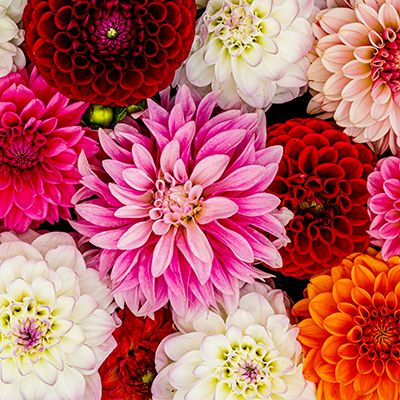
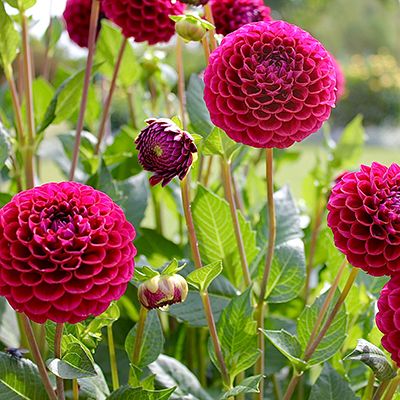
DAHLIAS DO NOT PRODUCE ONE KIND OF FLOWER. There are twelve different flower forms with blooms ranging from ten inches in diameter on the decorative (dinner plate) type down to the one inch pompons. The pompons may be only one foot tall while the dinner plate forms are up to six or seven feet tall. All are hybrids of two or three plants brought up from Mexico and South America in the 1800s. And, all are deer and rodent resistant.
As with all bulbs, Dahlias perform best in a rich, well-drained soil. This means that our heavy clay soil has to be amended. Ideally, the whole bed is amended by covering it with 2 to 3 inches of an amendment such as Master Nursery Gold Rush, Master Nursery Bumper Crop, Master Nursery Forest Blend, steer manure, horse manure or rice hulls. Next sprinkle Gypsum over the area at ten pounds per 100 square feet and Master Start Fertilizerat five pounds per 250 square feet. A little more or less is alright but don’t short change the amendment. Next; dig or roto-til these components together to a depth of six to eight inches. If you are unable to amend the whole bed then amend each hole with the same materials before planting your bulbs.
Dahlias should not be planted as individuals. Rather plant them in groups of six or more with short varieties in front, tall varieties in back and 24 to 36 inches apart. Dahlias need six or morehours of full sun each day.
The following directions are for decorative type Dahlias which will grow to six or more feet tall. Dig the hole in your bed about two feet in diameter and 12 inches deep. Amend the bottom of the hole with about three inches of the mix and stir to combine with an equal amount of native soil. Lay the bulbs attached to a piece of the crown at the bottom of the hole. We usually refer to these swollen root parts as bulbs when in actuality they are tuberous roots (yes, edible). There are no buds or sprouts on these swollen parts. If you plant one of these roots it will rot and die so you might as well throw loose bulbs away. When you are planting Dahlias, you must include a piece of the bottom of last year’s stem (called the crown) which contains buds that grow into a new plant. The swollen roots only provide food for the young plant.
A one-inch stake six or seven feet long should be driven into the soil next to the Dahlia bulbs. Cover the bulbs with about three inches of soil and firm gently. Water well and as the young plants grow, fill in with the soil and amendment mix. Remove the lowermost leaves as they become covered. When the soil level in the hole reaches the top, build a berm around the plant to hold water and irrigate as needed during the summer. Do not let the plants wilt or you may lose all of the flower buds that have formed. Irrigate long enough for water to sink in 12 to 16 inches. Fertilize every month with Master Nursery Bulb Food or Master Nursery Rose and Flower Food, liquid fish fertilizer or Gardner & Bloome Rose & Flower Fertilizer. Do not use a high Nitrogen fertilizer.
If you start your Dahlias by mid-March, they should start to bloom by mid-summer and continue until October or November. Cut flowers for table use or at least dead-head to maintain continuous bloom. Flowers for table use should be cut in the afternoon and placed immediately into water. All except the last two leaves next to the flower should be removed. Using a ‘flower fresh’ product or similar solution will help to prolong the blooms indoors.
By October, your Dahlias will be looking rather tired. They will probably have mildew and be producing few flowers. Leave them alone and let them go dormant. Dahlia bulbs can be left in the ground for up to two or three years and then they must be dug, stored and replanted the following spring. At the end of each year’s growth, the original bulbs have died and a new series of bulbs has formed on top of the old ones. After a few years, the bulbs are at the surface and cannot support the plant.
When it is time to dig your Dahlia bulbs in late September or October, make about a two foot diameter hole and carefully lift out the root mass. A spading fork is a good tool. Hose off any loose soil but do not separate the clump. If possible, soak the whole mass in a 9 to 1 solution of water and bleach for about 2 minutes to inhibit fungus. Store the root mass in a compost pile or sawdust or similar material over the winter. Keep the compost, etc. just barely moist. Never store in a plastic bag. By March, new sprouts should be visible at the base of the old stem. The plant can be divided at this time. Cut the stem so that one or two sprouts and two to five bulbs are all joined into one awkward arrangement. This cluster is placed in the bottom of the 12 inch hole as described above and the cycle is started again.
Dahlias are relatively disease resistant and pest free. However, by August, the first signs of mildew may appear on the lower parts of the plants. Either strip off the lowest one foot of leaves or spray the plant with Safer Garden Fungicide (Sulfur). This will not cure diseased leaves, but will prevent the mildew from infecting new leaves. During the next year, spray the plant with Sulfur or Fung-onil before it becomes infected.
Cucumber beetles look like ‘lady bugs’ except they are green and black instead of orange and black. They travel on the flowers and eat holes in the petals. Spray with Malathion, Pyrethrum or Sevin or pick them off by hand. If aphids are a problem, spray with Insect Killing Soap or one of the previously mentioned insecticides.
Mosaic Virus disease does not often appear on Dahlia plants but if it does, the plant should be destroyed. Symptoms are that the leaves may be distorted, and or chlorotic and or mottled. The plant may be stunted.
The virus is transmitted by aphids and survives the winter in the tubers in the ground and also in the roots of perennials and weeds nearby.
Control aphids on all Dahlias. Remove and destroy infected plants and nearby weeds. There are no sprays that control the virus.
Enjoy your Dahlias.